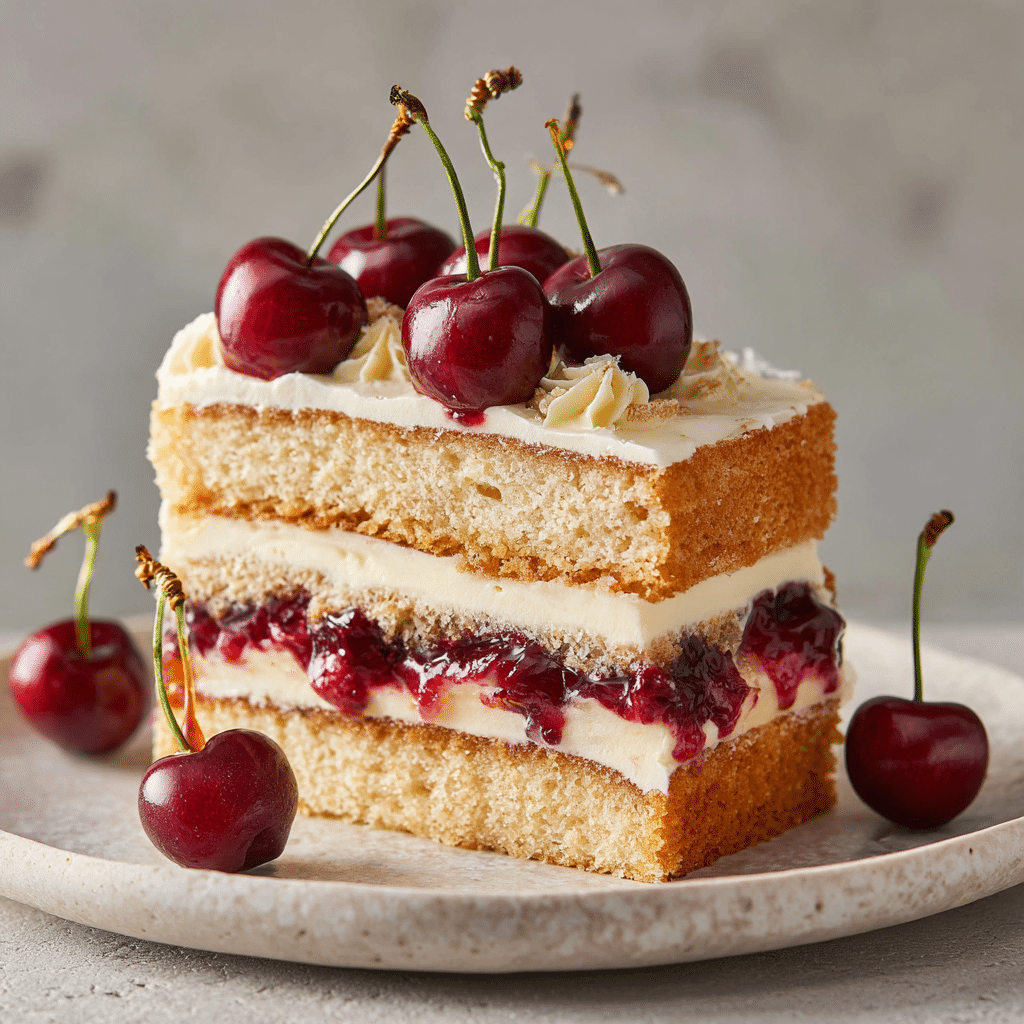
Cherry Vanilla Layer Cake Recipe
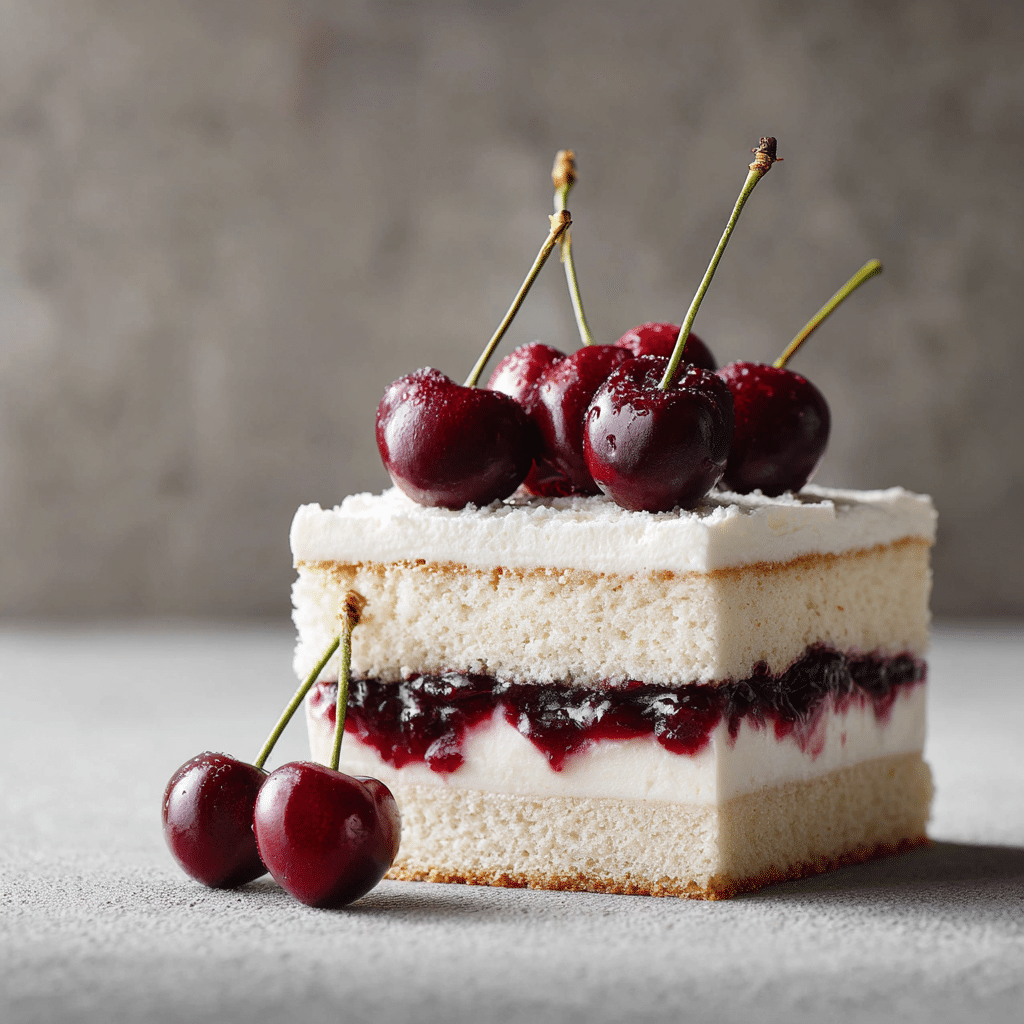
If you have a sweet tooth and love the perfect balance of fruity goodness and creamy indulgence, the Cherry Vanilla Layer Cake is going to become your new favorite. This cake combines a soft, airy vanilla sponge with luscious cherry compote and fluffy whipped cream in every bite. It’s a celebration of classic flavors that come together so beautifully, making it not just a treat for your taste buds but also a stunning centerpiece for any occasion. Let me take you through every delightful detail of this charming Cherry Vanilla Layer Cake that promises to wow your friends and family.
Ingredients You’ll Need
Every ingredient in the Cherry Vanilla Layer Cake plays its part in delivering a show-stopping dessert that’s simple yet irresistible. From the flour that builds the soft sponge to the fresh cherries that bring color and tang, here’s what you’ll need.
- 2 cups flour: The base of your cake providing structure and a tender crumb.
- 1 cup sugar: Sweetness that balances perfectly with the tart cherries.
- 3 eggs: Adds richness and helps bind everything together while giving lift to the sponge.
- 1 teaspoon vanilla: A warm, fragrant note that elevates the entire cake.
- 1 cup cherry compote: Juicy, vibrant filling that bursts with fruity flavor between the layers.
- 1 1/2 cups whipped cream: Light, airy, and creamy topping that melts in your mouth.
How to Make Cherry Vanilla Layer Cake
Step 1: Bake the Vanilla Sponge
Start by preheating your oven to 180°C (350°F). Mix the flour, sugar, eggs, and vanilla to create a smooth batter that promises a light and fluffy vanilla sponge. Pour this into a greased cake pan and bake for about 30 minutes until golden and springy to the touch. This sponge is the foundation for your Cherry Vanilla Layer Cake – soft, tender, and ready to soak up the cherry compote.
Step 2: Cool and Slice the Cake
Once the cake is baked, let it cool completely to avoid melting your luscious whipped cream later. After cooling, slice the cake horizontally into layers—two or three layers work best. These layers will become the perfect canvases to showcase the cherry and cream magic.
Step 3: Assemble with Cherry Compote and Whipped Cream
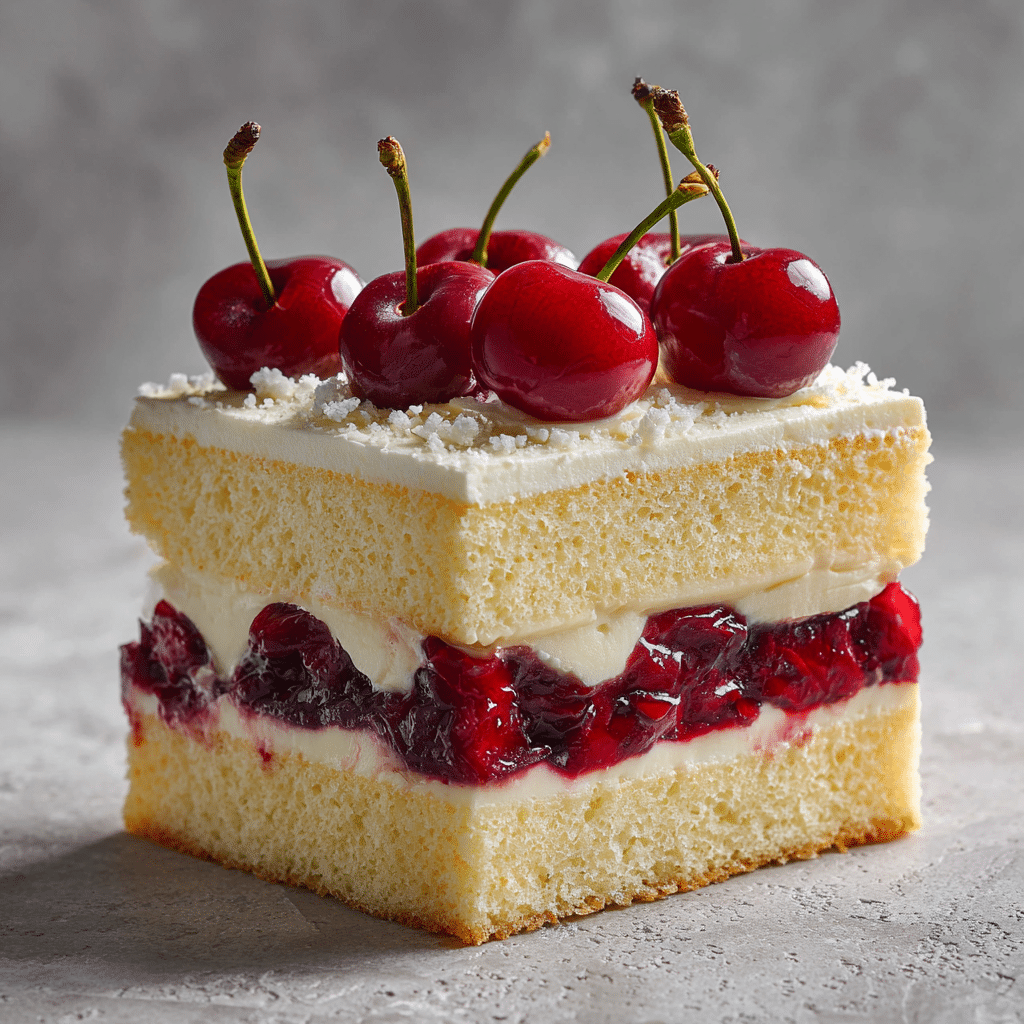
Spread a generous layer of sweet, slightly tart cherry compote over the bottom cake layer. Next, dollop and spread a fluffy layer of whipped cream over the cherries for that creamy contrast. Repeat if you have multiple layers. This step unites all your efforts into a stunning, multi-layered dessert that’s bursting with flavor.
Step 4: Decorate with Fresh Cherries
Top your assembled cake with fresh cherries to add a pop of color and the freshest burst of cherry flavor. The bright red cherries also make your cake look irresistible and perfect for any celebration. Now your Cherry Vanilla Layer Cake is ready to impress!
How to Serve Cherry Vanilla Layer Cake
Garnishes
Besides the fresh cherries on top, consider a light dusting of powdered sugar or a few mint leaves for a touch of elegance. Edible flower petals can also add a unique flair if you’re serving guests and want to elevate the presentation.
Side Dishes
Pair this cake with a scoop of vanilla bean ice cream or a small dish of fresh berries. The cold creaminess of the ice cream complements the layers perfectly, while the berries add freshness that balances the sweet richness.
Creative Ways to Present
Try serving slices of this Cherry Vanilla Layer Cake on delicate china with a drizzle of warm chocolate sauce or a spoonful of cherry compote on the side. For a casual twist, serve it in transparent glass cups layered with cake, compote, and cream for a stunning parfait-style dessert.
Make Ahead and Storage
Storing Leftovers
Keep leftovers covered tightly with plastic wrap or in an airtight container in the refrigerator. The Cherry Vanilla Layer Cake will stay fresh for up to 3 days, and the whipped cream and cherry layers will retain their delightful texture during this time.
Freezing
You can freeze the cake without the whipped cream topping to maintain its texture. Wrap the layers carefully in plastic wrap and foil, and freeze for up to 2 months. When ready to serve, thaw it in the refrigerator overnight and add fresh whipped cream and cherries before serving.
Reheating
This cake is best enjoyed cold or at room temperature so avoid reheating. If you prefer it slightly warmer, let it sit at room temperature for about 30 minutes before serving to bring out the flavors and soften the cream just a bit.
FAQs
Can I use frozen cherries for the compote?
Absolutely! Frozen cherries work wonderfully for making the compote. Just thaw them first and drain excess liquid before cooking to avoid watery filling.
What kind of vanilla should I use?
Pure vanilla extract is ideal for this recipe as it offers the best flavor. Avoid imitation vanilla to keep the taste authentic and rich.
Is there a way to make the cake dairy-free?
Yes, replace whipped cream with coconut whipped cream and use a dairy-free butter alternative when making the sponge for a delicious dairy-free Cherry Vanilla Layer Cake.
How do I avoid the cake drying out?
Make sure not to overbake the sponge and store the cake covered in the refrigerator. The cherry compote and whipped cream also help keep the cake moist and tender.
Can I make this cake gluten-free?
Definitely! Substitute the regular flour with a gluten-free all-purpose blend, ensuring it contains xanthan gum to help with structure. The texture will be slightly different but still delicious.
Final Thoughts
Making this Cherry Vanilla Layer Cake is like inviting happiness into your kitchen—each slice feels like a sweet hug filled with fruit and cream. Whether for a special celebration or just a fun baking project, this cake is sure to brighten your day and impress anyone lucky enough to share it with you. Don’t hesitate to give it a try and watch this delightful dessert become a beloved favorite.