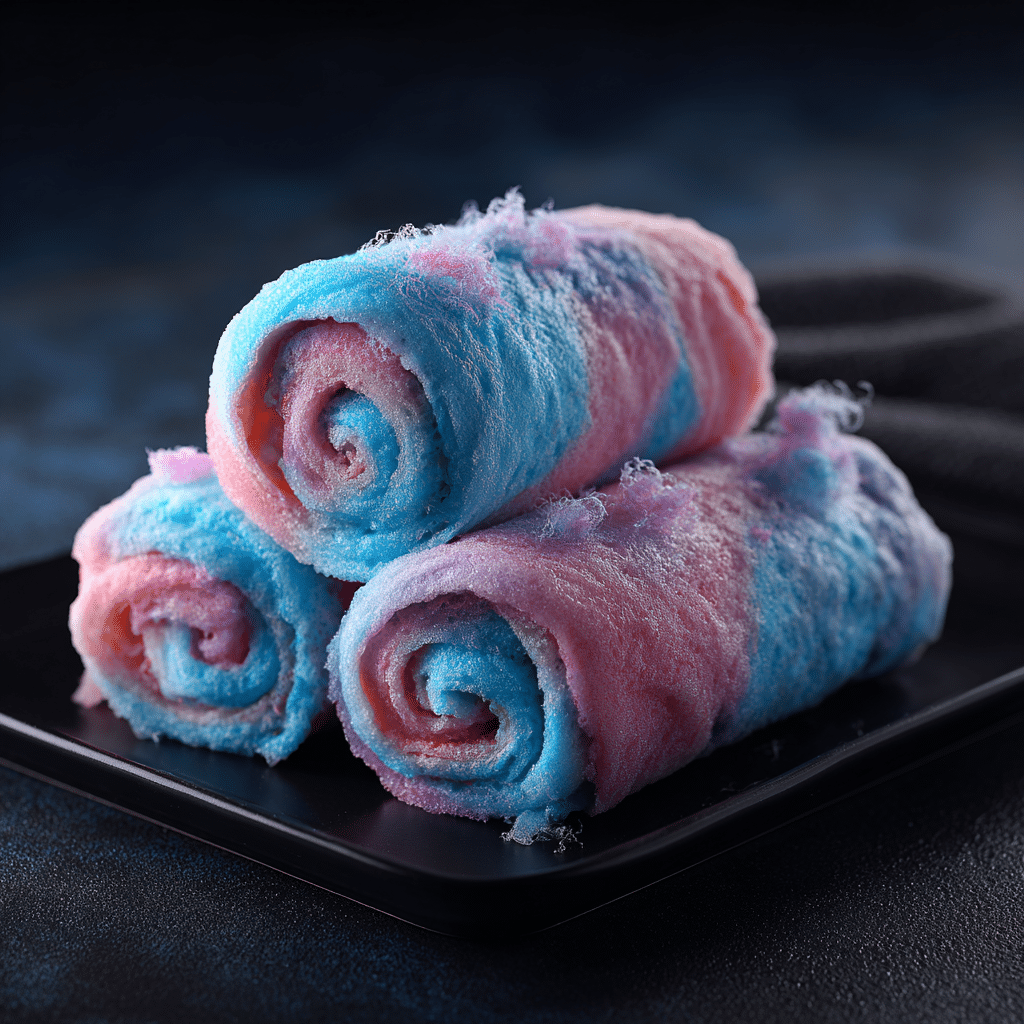
Cotton Candy Ice Cream Rolls Recipe
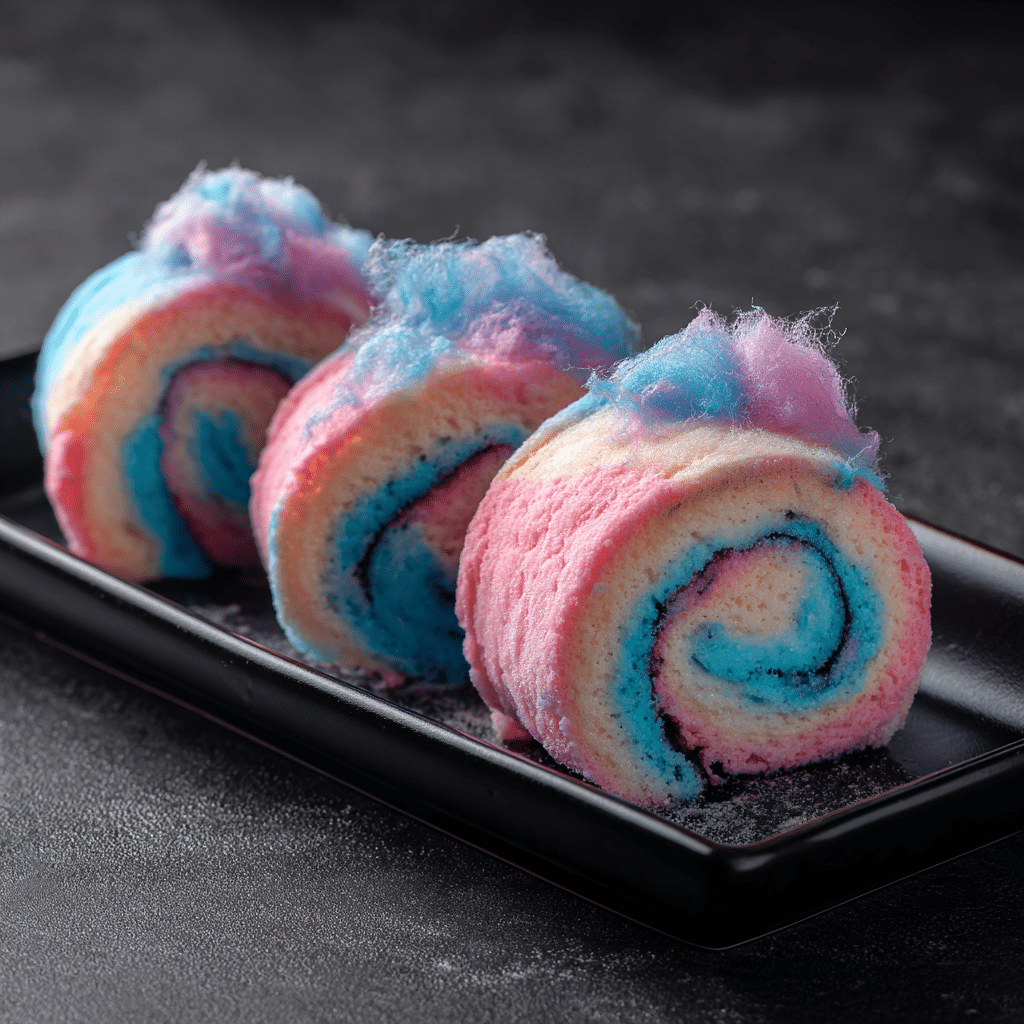
If you’re craving a whimsical dessert that’s as much a feast for the eyes as for your taste buds, Cotton Candy Ice Cream Rolls are an absolute must-try. These colorful, fun rolls of creamy ice cream capture the light, sugary essence of cotton candy while delivering an irresistibly smooth texture. Each bite combines playful sweetness with a cold, refreshing creaminess that feels delightful on a warm day or whenever you want to treat yourself to something joyfully indulgent. The way the ice cream is spread, rolled, and beautifully presented makes this dessert feel like a mini celebration in every serving.
Ingredients You’ll Need
Ingredients You’ll Need
Crafting the perfect Cotton Candy Ice Cream Rolls starts with a handful of simple, yet carefully chosen ingredients. Each one plays a vital role in achieving that perfect balance of creamy texture, pastel color, and sweet cotton candy flavor that makes this dessert stand out.
- Heavy cream: Provides a rich and smooth base that freezes beautifully, giving the rolls their creamy texture.
- Sweetened condensed milk: Sweetens and thickens the ice cream mixture, ensuring a luscious creaminess without ice crystals.
- Cotton candy flavored syrup or essence: The star ingredient that infuses the ice cream with its signature fluffy, sugary flavor and hint of pastel pink or blue hues.
- Vanilla extract: A touch of vanilla rounds out the flavor profile and balances the sweetness perfectly.
- Gel food coloring (optional): If you want to enhance the colorful look, a drop of pink, blue, or purple gel coloring brightens up the rolls beautifully.
How to Make Cotton Candy Ice Cream Rolls
Step 1: Prepare Your Ice Cream Base
Begin by whisking together your heavy cream, sweetened condensed milk, vanilla extract, and cotton candy syrup until smooth and fully combined. If you’re using gel food coloring, add it now to give your mixture that signature pastel cotton candy shade that feels instantly joyful.
Step 2: Chill the Freezing Pan
Make sure your freezing surface or cold plate is extremely cold — ideally well below freezing temperature. This is key to getting the ice cream to freeze quickly enough to roll properly, creating those distinct ribbons of creamy goodness.
Step 3: Spread the Base Thinly
Pour a small amount of your cotton candy ice cream base onto the cold plate and, using an angled spatula or scraper, spread it thinly and evenly across the surface. The thinner the layer, the better your rolls will form, so take your time to get a sleek, smooth layer.
Step 4: Roll It Up
Once the ice cream layer is firm and frozen, carefully scrape along the surface to create tight rolls. The technique is simple but requires a steady hand and a bit of playful practice—rolling is the most satisfying part because you see your creation come to life.
Step 5: Plate and Add Toppings
Place your delicate ice cream rolls upright in a bowl or dish to showcase how pretty they look. This is your chance to get creative with toppers that will enhance both flavor and appearance.
How to Serve Cotton Candy Ice Cream Rolls
Garnishes
Enhance your Cotton Candy Ice Cream Rolls by adding light and colorful garnishes such as mini marshmallows, rainbow sprinkles, fresh berries, or even a drizzle of additional cotton candy syrup. A few edible glitter sprinkles can take your presentation from fun to magical.
Side Dishes
Pair your ice cream rolls with a simple fresh fruit salad, crunchy waffle cones on the side, or a small cup of warm chocolate sauce for dipping. These sides add texture contrast and keep the experience exciting from start to finish.
Creative Ways to Present
Serve your rolls in clear glass cups or pastel-colored bowls that complement the cotton candy theme. You could even add a cotton candy fluff garnish on top to mimic the cloud-like sweetness, making each serving a delightful centerpiece at parties or family gatherings.
Make Ahead and Storage
Storing Leftovers
If you have any Cotton Candy Ice Cream Rolls leftover, gently place them in an airtight container to avoid freezer burn and to keep their flavor fresher for longer. Try to consume within a day or two to enjoy the best texture.
Freezing
You can freeze leftover rolls, but keep in mind that the texture might become slightly less creamy after thawing. Wrap each roll individually in plastic wrap, then store them in a sealed container to prevent odor absorption from other freezer contents.
Reheating
Since these are frozen treats, reheating is not recommended. Instead, let them sit at room temperature for a few minutes if they’re too hard, which will soften them up perfectly before serving again.
FAQs
What is the best type of cotton candy flavor to use?
Most people prefer classic pink cotton candy syrup for that nostalgic taste and vibrant color, but blue raspberry works great too if you want a fun twist. Just choose a high-quality syrup or essence to get a rich authentic flavor.
Can I make Cotton Candy Ice Cream Rolls without a special cold plate?
While having a cold plate helps create the perfect texture and rolling experience, you can try using a flat metal baking sheet in the freezer if it’s super cold, though it might be trickier to roll smoothly.
How long does it take to make Cotton Candy Ice Cream Rolls?
From mixing to rolling and garnishing, this dessert usually takes about 15 to 20 minutes once your freezing surface is ready, making it a quick but impressive treat to whip up.
Are Cotton Candy Ice Cream Rolls suitable for kids?
Absolutely! Kids love the bright colors and fun rolled shape, plus the sweet cotton candy flavor tends to be a big hit with little ones. Just be sure to serve in age-appropriate portions.
What toppings go best with Cotton Candy Ice Cream Rolls?
Think fruity, crunchy, and colorful—sprinkles, fresh berries, chopped nuts, or even small pieces of cotton candy on top all complement the ice cream without overpowering its signature flavor.
Final Thoughts
Making Cotton Candy Ice Cream Rolls is such a joyful experience, from swirling the pastel-hued ice cream to rolling and decorating each bite-sized treat. It’s a playful twist on a classic favorite that’s perfect for sharing smiles and sweet moments with friends or family. I can’t wait for you to try making your own and see how this fun dessert brightens your day!