Oreo Dessert Cups Recipe
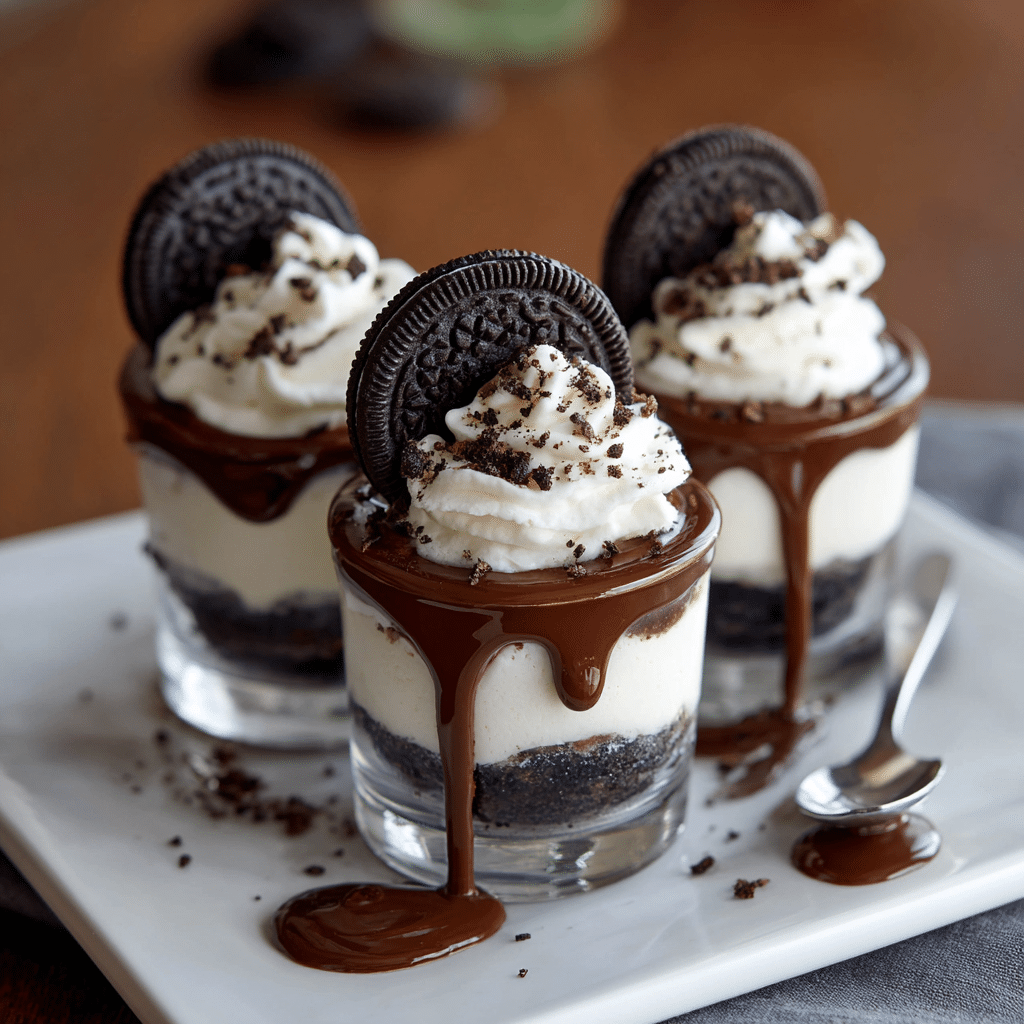
If you have a sweet tooth and love classic flavors with a fun twist, these Oreo Dessert Cups are an absolute treat you cannot miss. Imagine layers of crushed Oreo biscuits mingling effortlessly with rich, velvety cream, creating a texture that is delightfully creamy and satisfyingly crunchy in every spoonful. This no-bake wonder brings together simple ingredients that transform effortlessly into a charming, indulgent dessert perfect for any occasion. Whether you’re looking to impress guests or just want a quick fix for those Oreo cravings, these Oreo Dessert Cups will quickly become your go-to dessert.
Ingredients You’ll Need
It’s amazing how just a few simple ingredients can come together to create something so scrumptious and visually inviting. Each element plays a key role—from the iconic crunch and chocolatey flavor of Oreo biscuits, to the creaminess that balances every bite, to the splash of milk that keeps everything perfectly smooth.
- Oreo biscuits: The star of the dish, providing that irresistible chocolate and cream crunch that Oreo fans adore.
- Cream: Whipped or fresh, it adds a luscious smoothness that contrasts beautifully with the cookie layers.
- Milk: Used to soften the crushed Oreos slightly, helping them bind and blend flavors without losing texture.
How to Make Oreo Dessert Cups
Step 1: Prepare the Oreo Biscuit Crumbs
Start by gently crushing the Oreo biscuits to create coarse crumbs. You want enough texture so that the crumbs don’t turn to powder but are small enough to layer beautifully in your cups. Lightly mix the crumbs with a splash of milk to help bind them slightly; this will add moisture and make the layers easier to assemble.
Step 2: Whip the Cream
Next, whip your cream until it becomes thick and fluffy. The cream’s airy texture is key to creating contrast between each Oreo layer. You can sweeten it slightly if you prefer, but the natural sweetness of the Oreos usually does the trick wonderfully.
Step 3: Assemble the Layers
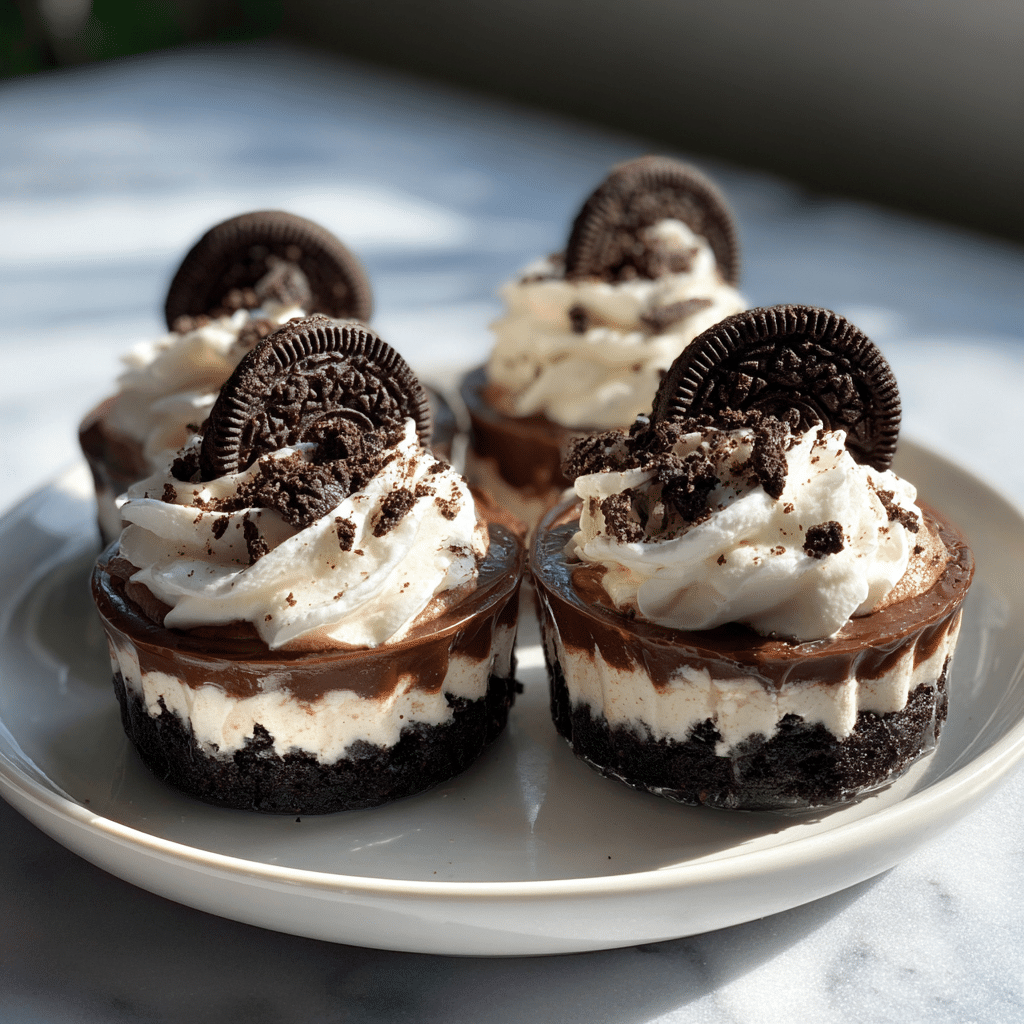
In your chosen dessert cups or small glasses, start with a layer of the milk-moistened Oreo crumbs. Add a generous dollop of whipped cream on top, then repeat the layers until you reach the top. Aim for at least two to three layers to get that perfect balance in every spoonful.
Step 4: Chill Before Serving
Once assembled, pop your Oreo Dessert Cups into the refrigerator for at least an hour. This allows the layers to meld, the cream to set slightly, and the flavors to deepen. Chilling also makes the dessert incredibly refreshing and helps each bite holde its shape.
How to Serve Oreo Dessert Cups
Garnishes
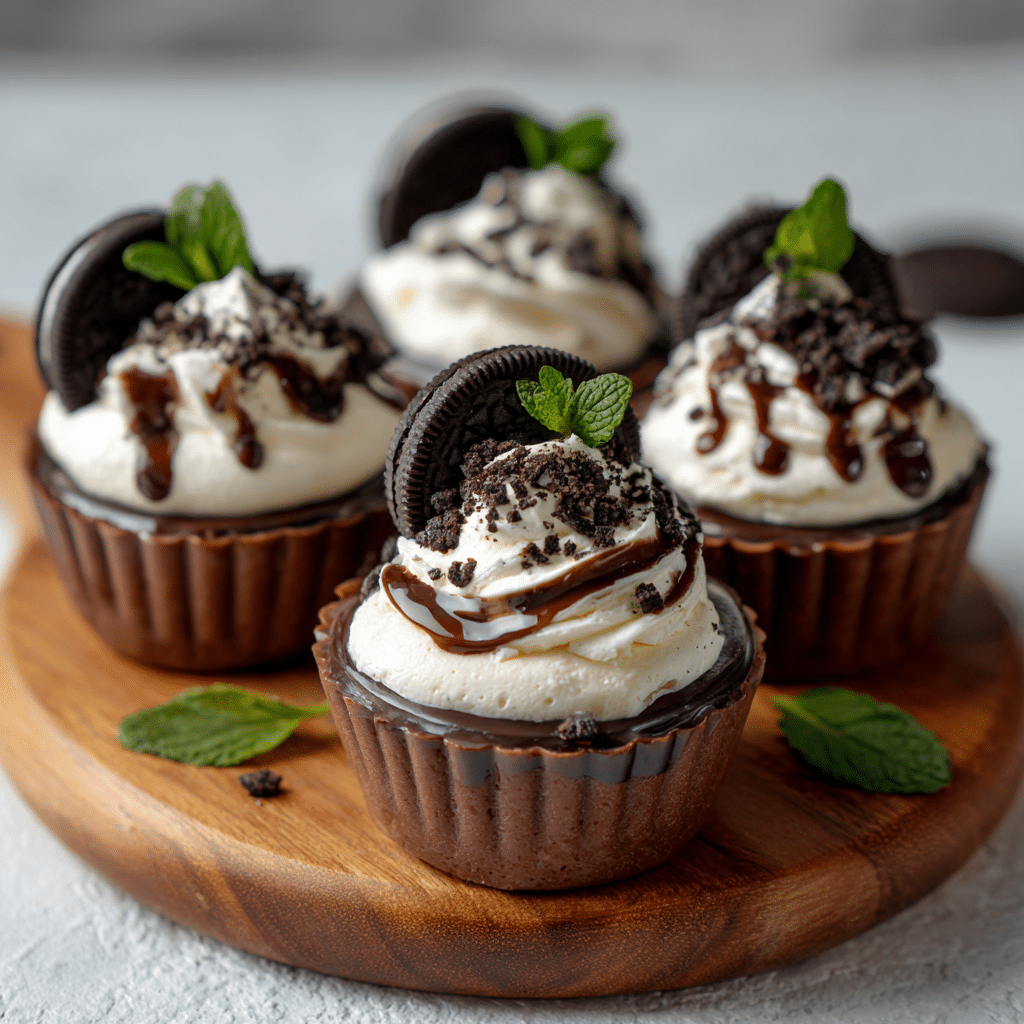
For an extra touch of flair, top your Oreo Dessert Cups with a sprinkle of crushed Oreos or a drizzle of chocolate sauce. Adding a few fresh berries or a sprig of mint can also brighten the look and taste, giving a hint of freshness amidst all the indulgence.
Side Dishes
Though these cups can shine on their own, pairing them with a scoop of vanilla ice cream or a dollop of tangy yogurt can bring a fun contrast in temperature and flavor. They also work beautifully alongside a cup of rich coffee or creamy hot chocolate, especially for a cozy evening treat.
Creative Ways to Present
Take your Oreo Dessert Cups to the next level by serving them in mini mason jars, clear shot glasses, or even hollowed-out citrus shells for a playful twist. Adding layers of crushed nuts, caramel, or caramelized banana slices between the Oreos and cream can personalize the dessert and wow your guests even more.
Make Ahead and Storage
Storing Leftovers
If you happen to have any leftovers, keep your Oreo Dessert Cups refrigerated in an airtight container. They will stay fresh and delicious for up to two days, although they are best enjoyed within the first 24 hours to maintain the perfect texture.
Freezing
While freezing isn’t ideal for maintaining the dessert’s creamy texture, you can freeze the assembled cups if needed. Just be aware that the cream may separate slightly upon thawing. To freeze, cover them tightly with plastic wrap and use within a month.
Reheating
These dessert cups are best served chilled and do not require reheating. If thawed from frozen, allow them to defrost naturally in the refrigerator for several hours before serving to revive that smooth, dreamy creaminess.
FAQs
Can I use low-fat cream for the Oreo Dessert Cups?
Absolutely! You can use any type of cream you prefer, but keep in mind that full-fat cream will provide a richer, more luxurious texture.
Is it necessary to chill the dessert cups before serving?
Chilling is essential as it helps the flavors meld and the dessert set properly, making each bite more satisfying and refreshing.
Can I make these dessert cups gluten-free?
You can substitute Oreos with a gluten-free chocolate cookie version to keep the flavor while accommodating dietary restrictions.
How many servings does this recipe make?
This recipe generally serves 4 to 6 people, depending on the size of your dessert cups and portion preferences.
Can I add other flavors or toppings?
Definitely! Feel free to mix in peanut butter, caramel, or fresh fruit layers, or top with nuts and chocolate shavings to customize your Oreo Dessert Cups.
Final Thoughts
Oreo Dessert Cups are such an effortless and satisfying way to enjoy a timeless cookie in a new, creamy form. They bring together simplicity and indulgence in a way that feels special but never complicated. I truly hope you give this recipe a try and discover how easy it is to whip up a dessert that tastes like a celebration in every spoonful.