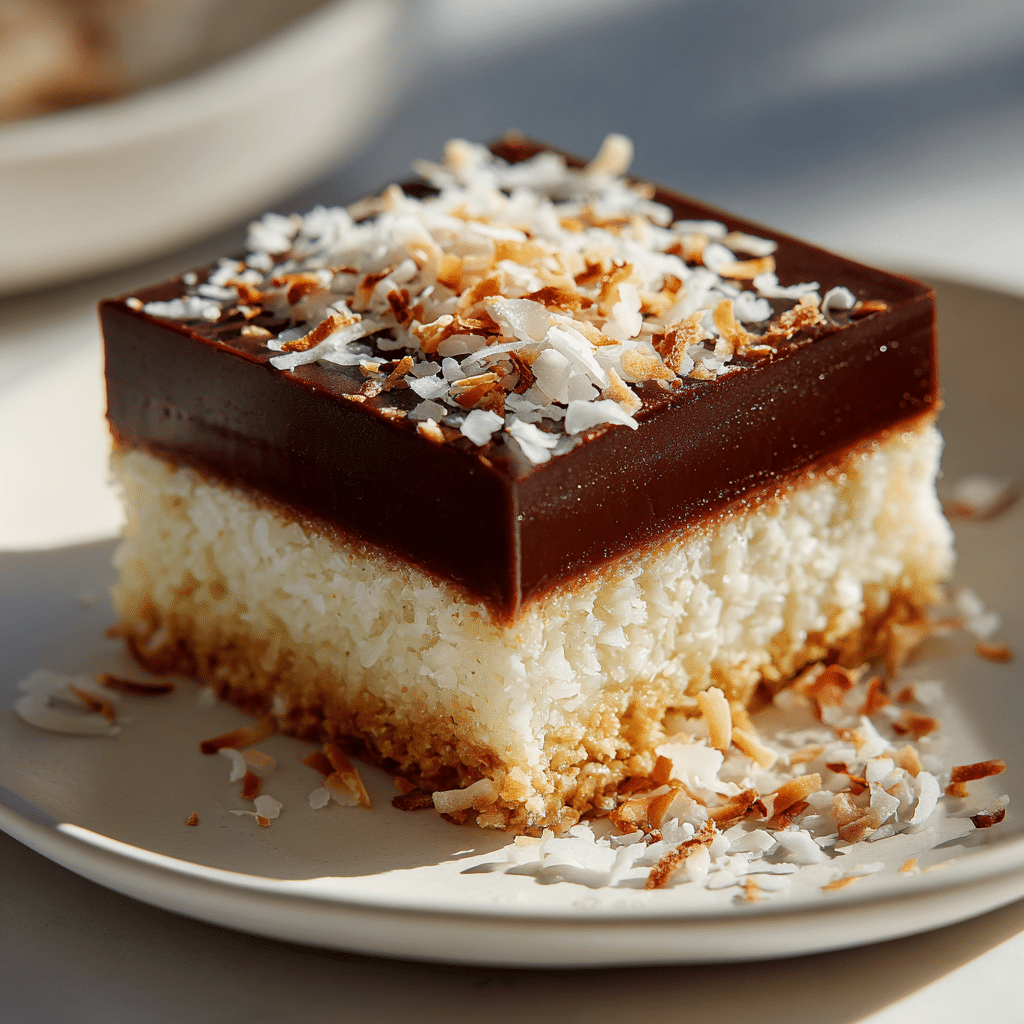
No-Bake Coconut Chocolate Slice Recipe
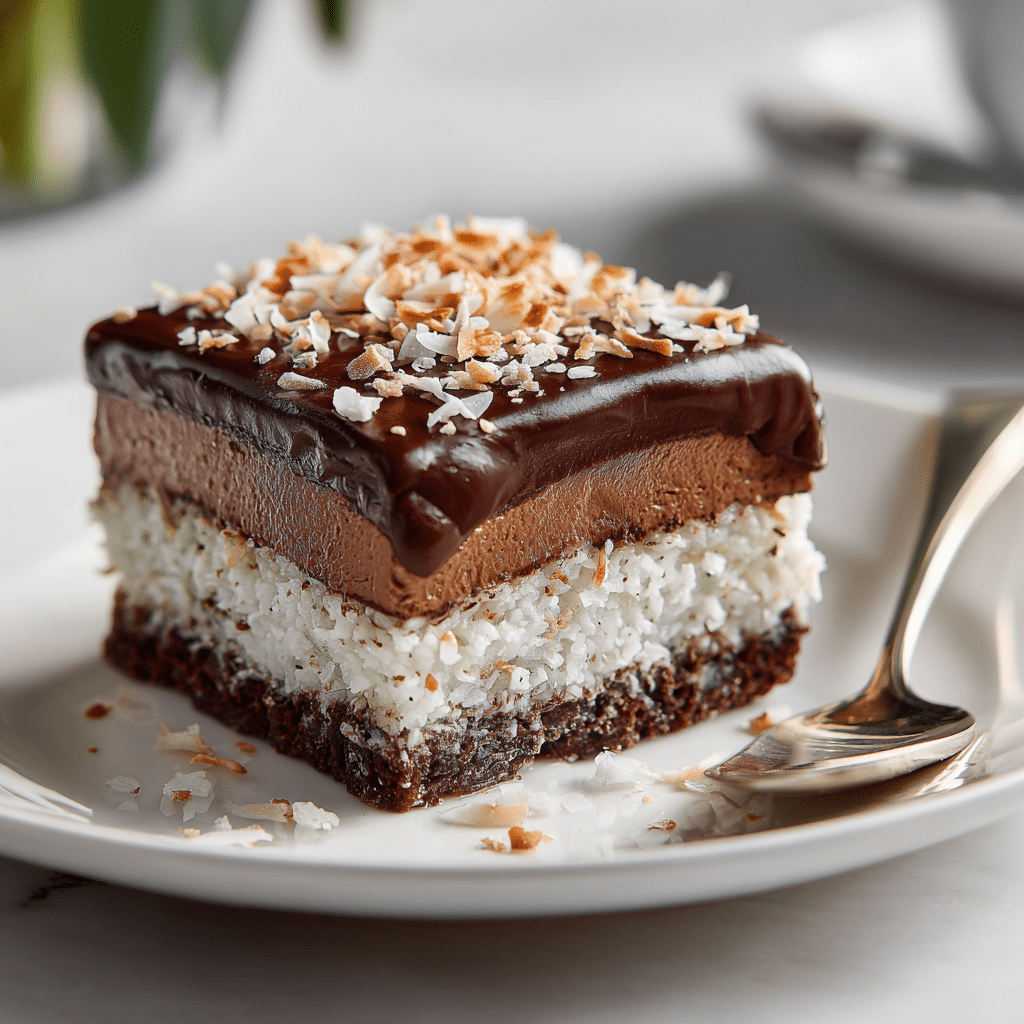
If you’re craving a treat that effortlessly blends indulgence and simplicity, you’re going to fall head over heels for this No-Bake Coconut Chocolate Slice. It takes just minutes to whip up, yet offers a decadent combination of velvety chocolate and toasted coconut that’s totally irresistible. The glossy top and tender bite make it feel like a special dessert, but without the fuss of an oven or complicated steps. Whether you’re serving it at a casual get-together or sneaking a slice after dinner, this delightful slice brings both comfort and sophistication with every bite.
Ingredients You’ll Need
Getting started on this No-Bake Coconut Chocolate Slice is a breeze because the ingredients are simple yet deliver bold flavors and textures. Each one plays a key role, from the creamy richness of chocolate to the chewy crunch of coconut, creating a perfect balance that’s hard to resist.
- Plain sweetened shredded coconut: Adds natural sweetness and a lovely chewy texture that shines through.
- Dark chocolate: Provides a rich, bittersweet foundation that melts in your mouth.
- Sweetened condensed milk: Acts as a luscious binder that keeps everything tender and moist.
- Butter: Brings smoothness and helps the slice set perfectly.
- Vanilla extract: Enhances all the flavors with a warm, comforting note.
- Chopped nuts (optional): Offers a subtle crunch and depth if you want to add a little extra texture.
How to Make No-Bake Coconut Chocolate Slice
Step 1: Melt the Chocolate and Butter
Start by gently melting the dark chocolate and butter together in a heatproof bowl over simmering water or carefully in the microwave. Stir often until the mixture is silky smooth. This step ensures that the chocolate is perfectly tempered for mixing and setting later, giving your slice that flawless glossy finish.
Step 2: Combine Sweetened Condensed Milk and Vanilla
In a separate bowl, give the sweetened condensed milk a quick stir, then mix in the vanilla extract. This will infuse a subtle sweetness and a delicate aroma that lifts the whole slice beyond just chocolate and coconut.
Step 3: Fold in Coconut and Optional Nuts
To the condensed milk mixture, add your shredded coconut and any nuts you might be using. Stir gently but thoroughly to make sure every bit of coconut is coated and evenly dispersed throughout the mixture. This builds the chewy, dense texture that makes the slice truly special.
Step 4: Combine All Ingredients
Pour the melted chocolate and butter into the coconut and condensed milk mixture. Fold everything together until beautifully combined. The chocolate should coat every piece of coconut, turning the mixture into a rich, dark, and inviting batter ready to be set.
Step 5: Press Into a Pan and Chill
Line a square or rectangular baking pan with parchment paper, then pour your mixture in. Press down firmly and evenly with a spatula or your hands to ensure a compact and level surface. Pop it into the fridge and chill for at least 2 hours, or until firm and sliceable.
How to Serve No-Bake Coconut Chocolate Slice
Garnishes
For a finishing touch, dust your slices with a little finely grated dark chocolate or a sprinkle of toasted coconut flakes. This not only looks stunning but adds an extra hint of texture and aroma that will wow anyone lucky enough to grab a piece.
Side Dishes
This slice pairs wonderfully with light accompaniments like fresh berries or a scoop of vanilla ice cream. The brightness of the fruit balances out the richness, making the dessert feel fresh and satisfying rather than overly heavy.
Creative Ways to Present
You can get creative by cutting the slice into fun shapes like diamonds or triangles instead of classic rectangles, or even arranging bite-sized cubes on a platter for parties. Wrapping individual pieces in parchment paper makes a fantastic gift or takeaway treat that friends and family will adore.
Make Ahead and Storage
Storing Leftovers
Once chilled, keep your leftover No-Bake Coconut Chocolate Slice stored in an airtight container in the refrigerator. It should stay fresh and maintain its texture for up to 5 days, perfect for enjoying throughout the week or saving a little indulgence for later.
Freezing
This slice freezes beautifully. Wrap individual pieces tightly in plastic wrap and place them in a freezer-safe container. When you want to enjoy some, simply thaw them in the refrigerator overnight for chocolatey perfection that tastes freshly made.
Reheating
Since this slice is best enjoyed chilled and firm, reheating isn’t really necessary. If you prefer a softer texture, allow slices to come to room temperature for about 10–15 minutes before serving for a more melt-in-your-mouth experience.
FAQs
Can I use desiccated coconut instead of shredded coconut?
Yes! Desiccated coconut works just as well. It’s finer, so you might notice a slightly different texture, but it will still create that delicious coconut flavor and chewy bite this slice is known for.
Is it possible to make this slice vegan?
To make the slice vegan, substitute the condensed milk with a dairy-free condensed milk alternative and use dairy-free chocolate and a plant-based butter substitute. The texture might vary slightly, but the flavors remain delightful.
What type of chocolate works best?
Use high-quality dark chocolate with around 60-70% cocoa content for the best balance of richness and slight bitterness. This balances the sweetness from the condensed milk and coconut beautifully.
Can I add other flavors to the slice?
Absolutely! Adding a pinch of sea salt, a dash of cinnamon, or even a splash of rum extract can elevate the flavor profile and give the slice a unique twist that’s all your own.
How thick should I make the slice when pressing into the pan?
About 2 centimeters thick is ideal. This thickness lets the slice set firmly while still being easy to cut and enjoy in satisfying portions without feeling too dense or overly thick.
Final Thoughts
This No-Bake Coconut Chocolate Slice is truly one of those recipes that becomes a fast favorite – it’s quick, delicious, and versatile enough for any occasion. I can’t recommend it enough as a sweet treat that feels indulgent but requires minimal effort. Give it a try, and watch it become your go-to dessert for when you want something special in no time at all.