Strawberry Cheesecake Cups Recipe
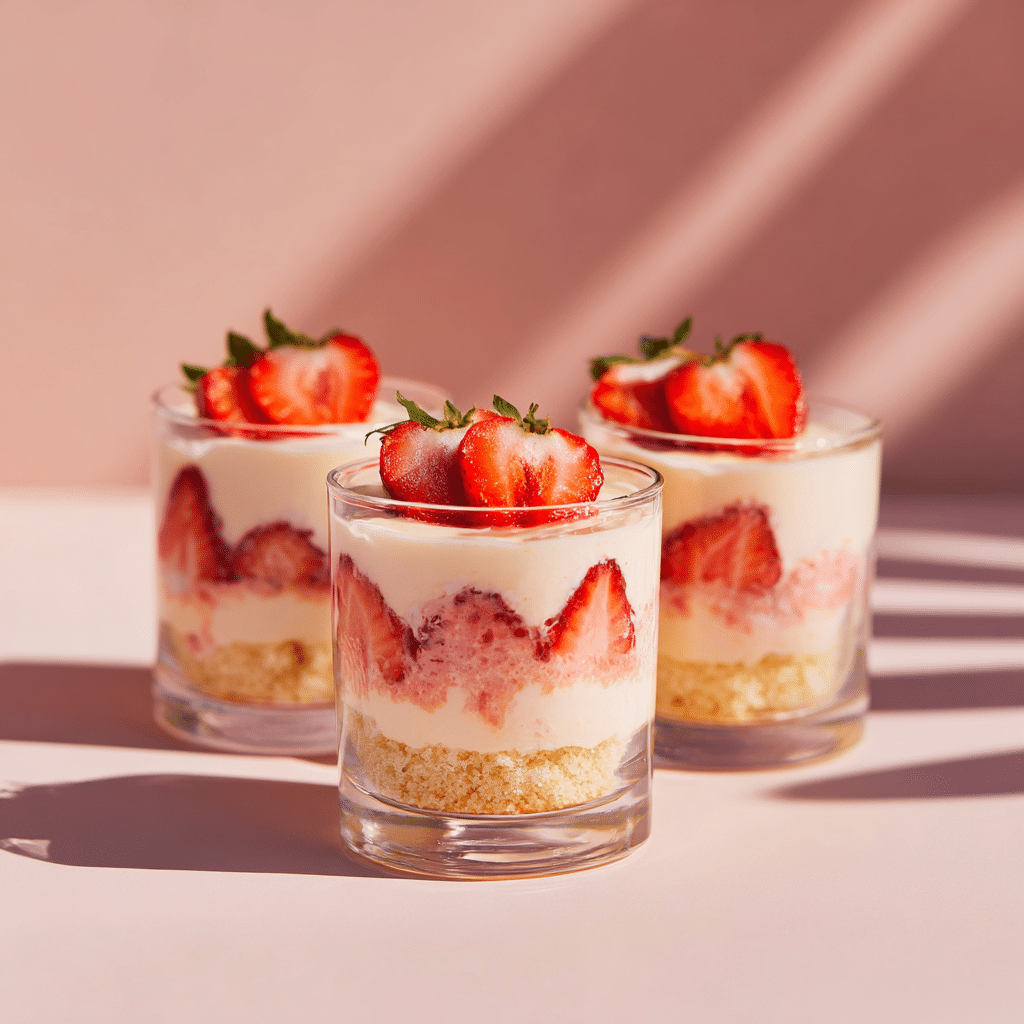
If you are craving a delightful dessert that’s as visually charming as it is irresistibly tasty, these Strawberry Cheesecake Cups are just the treat for you. This no-bake delight layers a creamy, velvety cheesecake filling with fresh, juicy strawberries, all resting on a buttery biscuit base. Perfectly simple yet impressive, Strawberry Cheesecake Cups combine just the right balance of sweet, tangy, and fresh flavors that make every spoonful feel like a celebration. Whether it’s a sunny afternoon snack or a show-stopping finale to dinner, these cups are sure to win hearts and satisfy sweet cravings effortlessly.
Ingredients You’ll Need
Ingredients You’ll Need
The magic of Strawberry Cheesecake Cups starts with a handful of simple ingredients that work together to create layers of irresistible texture and flavor. Each ingredient plays a key role in delivering the classic creamy and fruity combo you love.
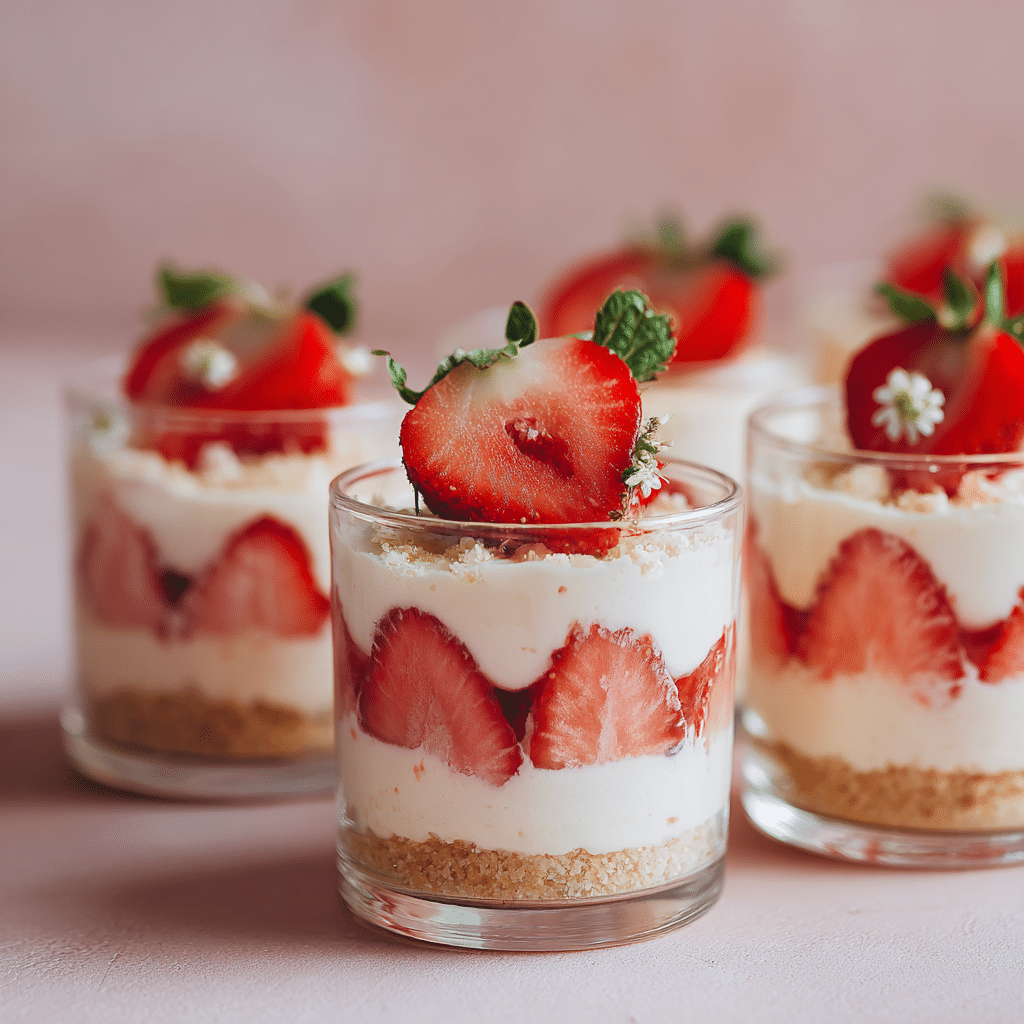
- Biscuit crumbs: Provides a buttery, crunchy base that contrasts beautifully with the creamy filling.
- Butter: Acts as the binding agent to hold the biscuit layer firmly in place.
- Cream cheese: The star of the filling, bringing that rich, tangy creaminess essential to every cheesecake.
- Sugar: Sweetens the cream cheese just enough without overpowering the natural strawberry flavor.
- Fresh strawberries: Adds a vibrant, juicy freshness that makes these cups so delightfully refreshing.
How to Make Strawberry Cheesecake Cups
Step 1: Prepare the Biscuit Base
Start by crushing your biscuits into fine crumbs, then mix them thoroughly with melted butter. This mixture will be the foundation of your Strawberry Cheesecake Cups, providing a buttery crunch that complements the smooth cheesecake layer. Press the mixture firmly into the bottom of serving cups to create an even layer that will hold the dessert together flawlessly.
Step 2: Make the Cream Cheese Filling
In a bowl, softly beat the cream cheese with sugar until smooth and creamy. This step is crucial to achieving that luscious filling texture, so be patient and ensure there are no lumps. The sugar blends in just enough sweetness to balance the tang of the cream cheese, making this layer utterly irresistible.
Step 3: Layer with Fresh Strawberries
Once your biscuit base and cream cheese filling are ready, it’s time to layer the fresh strawberries on top. You can slice them or add them whole depending on your preference, but their natural juiciness will soak slightly into the filling, adding bursts of fruity flavor in every bite. Then spoon the cream cheese mixture over the strawberries to create beautiful, distinct layers.
How to Serve Strawberry Cheesecake Cups
Garnishes
To elevate your Strawberry Cheesecake Cups, consider adding a few garnishes like a sprig of fresh mint, a drizzle of strawberry syrup, or a sprinkle of crushed nuts for texture. These simple touches not only add visual appeal but also complement the flavors, making each cup feel like a little work of art.
Side Dishes
Pairing Strawberry Cheesecake Cups with light, refreshing sides works best—think a crisp green salad with citrus dressing or a chilled fruit salad. These sides won’t overpower the delicate flavors of the cheesecake cups but will round out your meal with balance and brightness.
Creative Ways to Present
Instead of serving these cups in plain containers, try using mason jars or glass tumblers to showcase the beautiful layers. Layering them in clear glasses allows everyone to admire the contrast of the biscuit base, creamy cheesecake, and ruby-red strawberries before digging in—making the experience just as delightful as the dessert itself.
Make Ahead and Storage
Storing Leftovers
Strawberry Cheesecake Cups store wonderfully in the refrigerator for up to 3 days. Keep them covered tightly with plastic wrap or in airtight containers to maintain freshness and prevent the biscuit base from becoming soggy.
Freezing
While these cups are best enjoyed fresh, you can freeze the cheesecake filling separately for up to one month. However, freezing the entire assembled cups is not recommended due to the texture change in fresh strawberries upon thawing.
Reheating
Since Strawberry Cheesecake Cups are best served chilled, reheating isn’t necessary. Simply take them out of the refrigerator a few minutes before serving to let the flavors mellow slightly, then enjoy the cool, creamy goodness.
FAQs
Can I use frozen strawberries?
Fresh strawberries are ideal because they retain their texture and flavor best in Strawberry Cheesecake Cups. Frozen strawberries tend to release too much moisture when thawed, which can make the dessert watery.
Is it possible to make these vegan?
Absolutely! Swap regular cream cheese for a plant-based version, and use vegan-friendly butter to create the biscuit base. Just be sure the sugar you use is also vegan to keep the dessert completely plant-based.
How can I make the biscuit base gluten-free?
You can substitute regular biscuits with gluten-free cookies or graham crackers. The process stays the same, ensuring everyone can enjoy these delicious Strawberry Cheesecake Cups.
Can I add other fruits besides strawberries?
Yes, feel free to experiment by adding blueberries, raspberries, or even sliced kiwi. While these variations may change the classic flavor slightly, they add a fun twist to your Strawberry Cheesecake Cups.
How long does it take to prepare these cups?
One of the best parts of this recipe is its simplicity—it takes about 15 to 20 minutes to prepare, making it a quick and easy dessert option for any occasion.
Final Thoughts
These Strawberry Cheesecake Cups are truly a joy to make and even more joyful to eat. Their simple elegance combined with fresh, vibrant flavors makes them a must-try dessert that will brighten any day. I hope you have as much fun making them as I do sharing them with friends and family—go ahead, whip up a batch and enjoy every creamy, fruity bite!