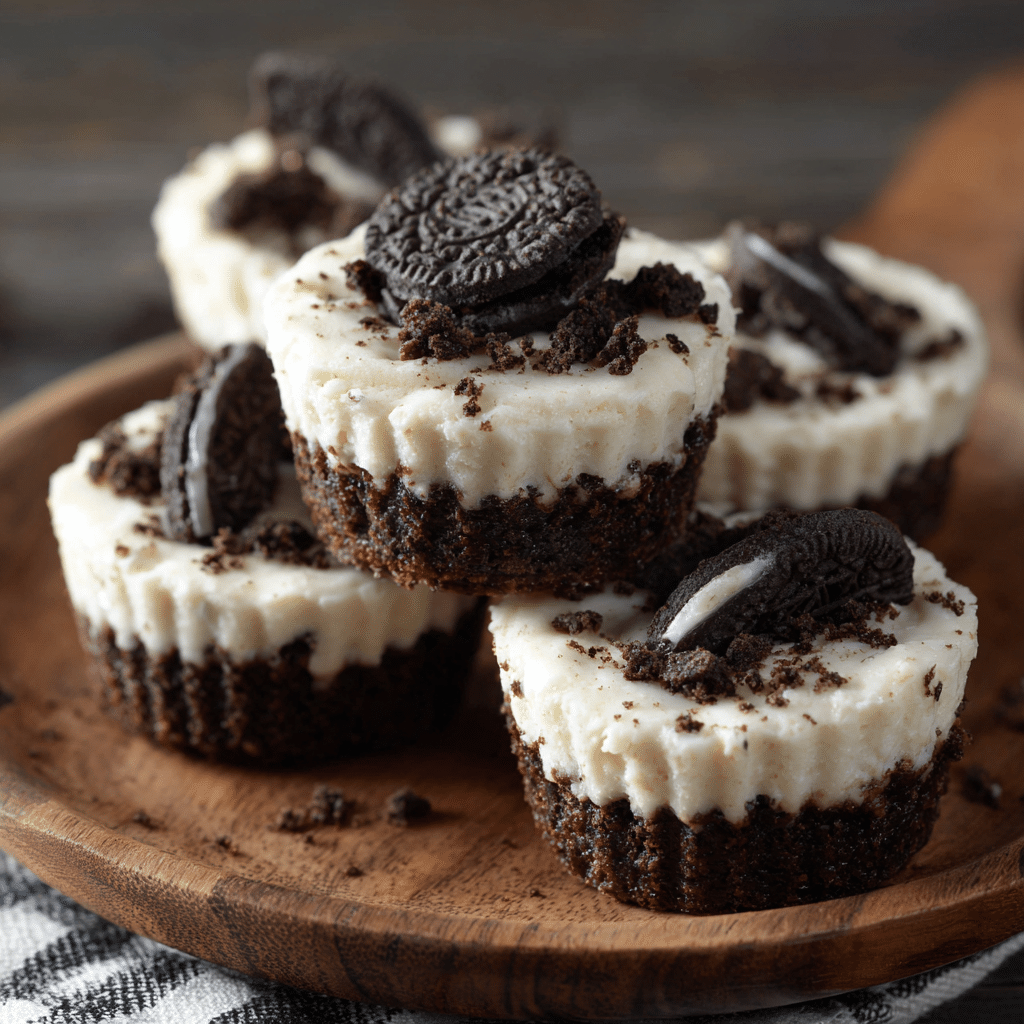
No-Bake Oreo Cheesecake Cups Recipe

If you adore desserts that combine creamy richness with a bit of crunch, then you are in for a real treat with these No-Bake Oreo Cheesecake Cups. Imagine luscious layers of fluffy cheesecake mingling with crushed Oreo cookies, all nestled in charming individual cups that make serving effortless and elegant. This recipe captures the indulgent flavor of classic cheesecake but skips the oven entirely, offering a quick, fuss-free way to impress at any gathering or simply satisfy a sweet craving at home. Whether you’re hosting a party or looking for an easy dessert to whip up in minutes, the No-Bake Oreo Cheesecake Cups will become an instant favorite.
Ingredients You’ll Need
Gathering the ingredients for these No-Bake Oreo Cheesecake Cups is delightfully simple, yet each item plays a crucial role in crafting the perfect balance of flavor and texture. From the iconic crunch of Oreos to the velvety smoothness of cream cheese, every component enhances this dessert’s charm.
- Oreo cookies: Use classic Oreos for that signature chocolate and cream crunch, and save a few crushed cookies for topping.
- Cream cheese: Make sure it’s softened to room temperature for effortless mixing and a silky texture.
- Whipped cream: Light and airy, it folds into the cheesecake base to create a fluffy, cloud-like consistency.
- Sugar: Just the right amount to sweeten the cream cheese mixture without overpowering the delicate flavors.
- Vanilla extract: Adds a warm, comforting aroma that elevates the overall taste of the cheesecake filling.
How to Make No-Bake Oreo Cheesecake Cups
Step 1: Prepare the Oreo Crust Layers
Begin by crushing your Oreo cookies until they’re in fine crumbs with a few small chunks to keep that lovely texture. You can do this quickly by placing cookies in a bag and rolling a rolling pin over them or pulsing in a food processor. These crumbs will form the delightful crunchy layers that perfectly contrast the creamy filling.
Step 2: Whip the Cream Cheese Mixture
Next, beat the softened cream cheese in a bowl until smooth and creamy. Gradually add in the sugar and vanilla extract, mixing until everything is well combined and silky. This mixture is the base of your cheesecake, and the key to that rich and tangy flavor you crave.
Step 3: Fold in the Whipped Cream
Gently fold in the whipped cream to the cream cheese batter. This step is crucial to keeping your cheesecake light and fluffy. Take your time and use a spatula to carefully combine the ingredients, ensuring the mixture stays aerated and luscious.
Step 4: Assemble the Cups
Grab your serving cups and start layering. Begin with a spoonful of crushed Oreos at the bottom, add a generous layer of the cheesecake filling, then alternate once more to fill the cups. The visual layers of dark cookie and creamy filling are absolutely irresistible.
Step 5: Chill and Set
Place the assembled cups in the refrigerator for at least a few hours, or overnight if possible, to allow the cheesecake filling to firm up beautifully. This chilling step is where the flavors meld together, and the texture sets perfectly ready for serving.
How to Serve No-Bake Oreo Cheesecake Cups

Garnishes
Simple garnishes can turn your No-Bake Oreo Cheesecake Cups from delightful to dazzling. Sprinkle a few extra crushed Oreos on top or add a dollop of whipped cream for a pretty contrast. For an extra touch, a drizzle of chocolate syrup or a few fresh berries can add flavor and a pop of color that wows the eye.
Side Dishes
Pair these cheesecake cups with light and refreshing sides to balance the richness. A tangy fruit salad or a crisp mint tea offers a bright counterpoint and keeps the dessert experience fresh and exciting. They are perfect for summer picnics or casual get-togethers alongside these treats.
Creative Ways to Present
Think beyond plain cups for serving these gems. Clear mason jars or mini glass tumblers showcase the lovely layers beautifully. Adding a small decorative spoon with a colorful handle or a cute tag with a personalized message can turn them into charming party favors. Presentation really enhances the enjoyment and keeps guests coming back for another bite.
Make Ahead and Storage
Storing Leftovers
If you happen to have leftovers, store the No-Bake Oreo Cheesecake Cups in an airtight container in the refrigerator. They will keep well for up to 3 days while maintaining their creamy texture and fresh flavor. Just remember to cover them tightly to prevent the cookies from becoming soggy.
Freezing
You can freeze these cheesecake cups if you want to prepare them well in advance. Wrap each cup tightly with plastic wrap and place them in a freezer-safe container. When you’re ready to enjoy, thaw them overnight in the refrigerator. Keep in mind the texture of the whipped cream might shift slightly upon freezing, but the flavor remains delightful.
Reheating
Since this is a no-bake, chilled dessert, reheating is not necessary and generally not recommended. The No-Bake Oreo Cheesecake Cups are best enjoyed cold straight from the refrigerator to savor their perfect creamy texture and refreshing taste.
FAQs
Can I use other types of cookies besides Oreos?
Absolutely! While Oreos give a classic chocolate-and-cream flavor, you can experiment with other cookies like chocolate chip, peanut butter, or even gingersnaps for a different but equally delicious twist.
Do I have to use whipped cream or can I substitute it?
Whipped cream is essential for the light and fluffy texture of the cheesecake filling. However, you could try whipped coconut cream as a dairy-free alternative, though the texture might be slightly different.
Is it okay to use low-fat cream cheese?
While low-fat cream cheese will cut some calories, it can affect the richness and texture. Full-fat cream cheese is recommended for the creamiest and most indulgent No-Bake Oreo Cheesecake Cups.
How long should I chill the cups before serving?
To achieve the best texture and flavor, chill the cups for at least 3 hours. Overnight chilling is ideal because it allows the layers to set fully and the flavors to marry beautifully.
Can I make these cups gluten-free?
Yes! Simply swap the Oreos for gluten-free chocolate sandwich cookies, and be sure that your other ingredients do not contain gluten. The cheesecake cups will still be just as irresistible.
Final Thoughts
These No-Bake Oreo Cheesecake Cups are a delightful way to enjoy a classic dessert without the hassle of an oven. Their creamy layers and crunchy cookie bits make every bite a joy, perfect for any occasion. I can’t wait for you to try them and share the smiles they bring at your table!